2. How to add the model to the web app
This is a guide on how to load the model into the app onto the page, for model configuration or add new model, please refer to the implementation_structure/02_assets:Model Configuration document.
2.1. Loading the model
We are using three.js and cropper3D.js in the app. For overall 3D model loading, please refer to the display model. In this document, we will focus on the VTKLoader and how to load the VTK models.
2.1.1. Initialization the VTKLoader
Create the scene, for more details, please refer to the three.js scene
this.scene = this.baseRenderer.getSceneByName('placental-scene');
if (this.scene === undefined) {
  this.scene = this.baseRenderer.createScene('placental-scene');
  this.baseRenderer.setCurrentScene(this.scene);
}
Initialize the VTKLoader, add the scene to the VTKLoader
this.vtkLoader = new VTKLoader(this.THREE, this.scene.scene);
Initialize the Copper3D scene, which is used to control the camera
this.vtkLoader.setCopperScene(this.scene);
Camera positions and orientations are stored in /static/modelView/.
2.1.2. Call the VTKLoader to load the model
In the frontend/components/model/Model.vue file, we can call the loadVTKFile function to load the model.
this.vtkLoader.loadVTKFile(vtkPath, {
  displayName: 'Custom Model Name', // the name of the model
  color: 0xff00ff, // the color of the model
  opacity: 0.9, // the opacity of the model
  modelSize: 420, // the size of the model
  useCylinderGeometry: true,
  defaultRotationY: config.defaultRotationY || 0, // some model may need to be rotated default, so we can set the default rotation angle here
  onProgress: (message, progress) => {
    // update the progress of the model loading
  },
  onComplete: (mesh) => {
    // update the model loading complete, this is used to update the model loading complete in the UI
  }
});
2.2. Update the model information
Once the state of model loading is changed (e.g. compelete loading / on progress loading / error loading), we can update the model information by calling the model-state-updated event.
Below is the example of the
model-state-updatedevent:onProgress: (message, progress) => { // update the progress of the model loading this.$emit('model-state-updated', { modelName: 'Downloading model data...' }); },
Then the modelName will be updated to Downloading model data... in the UI.
The modelName is desplayed at the top of the model viewport like the following:
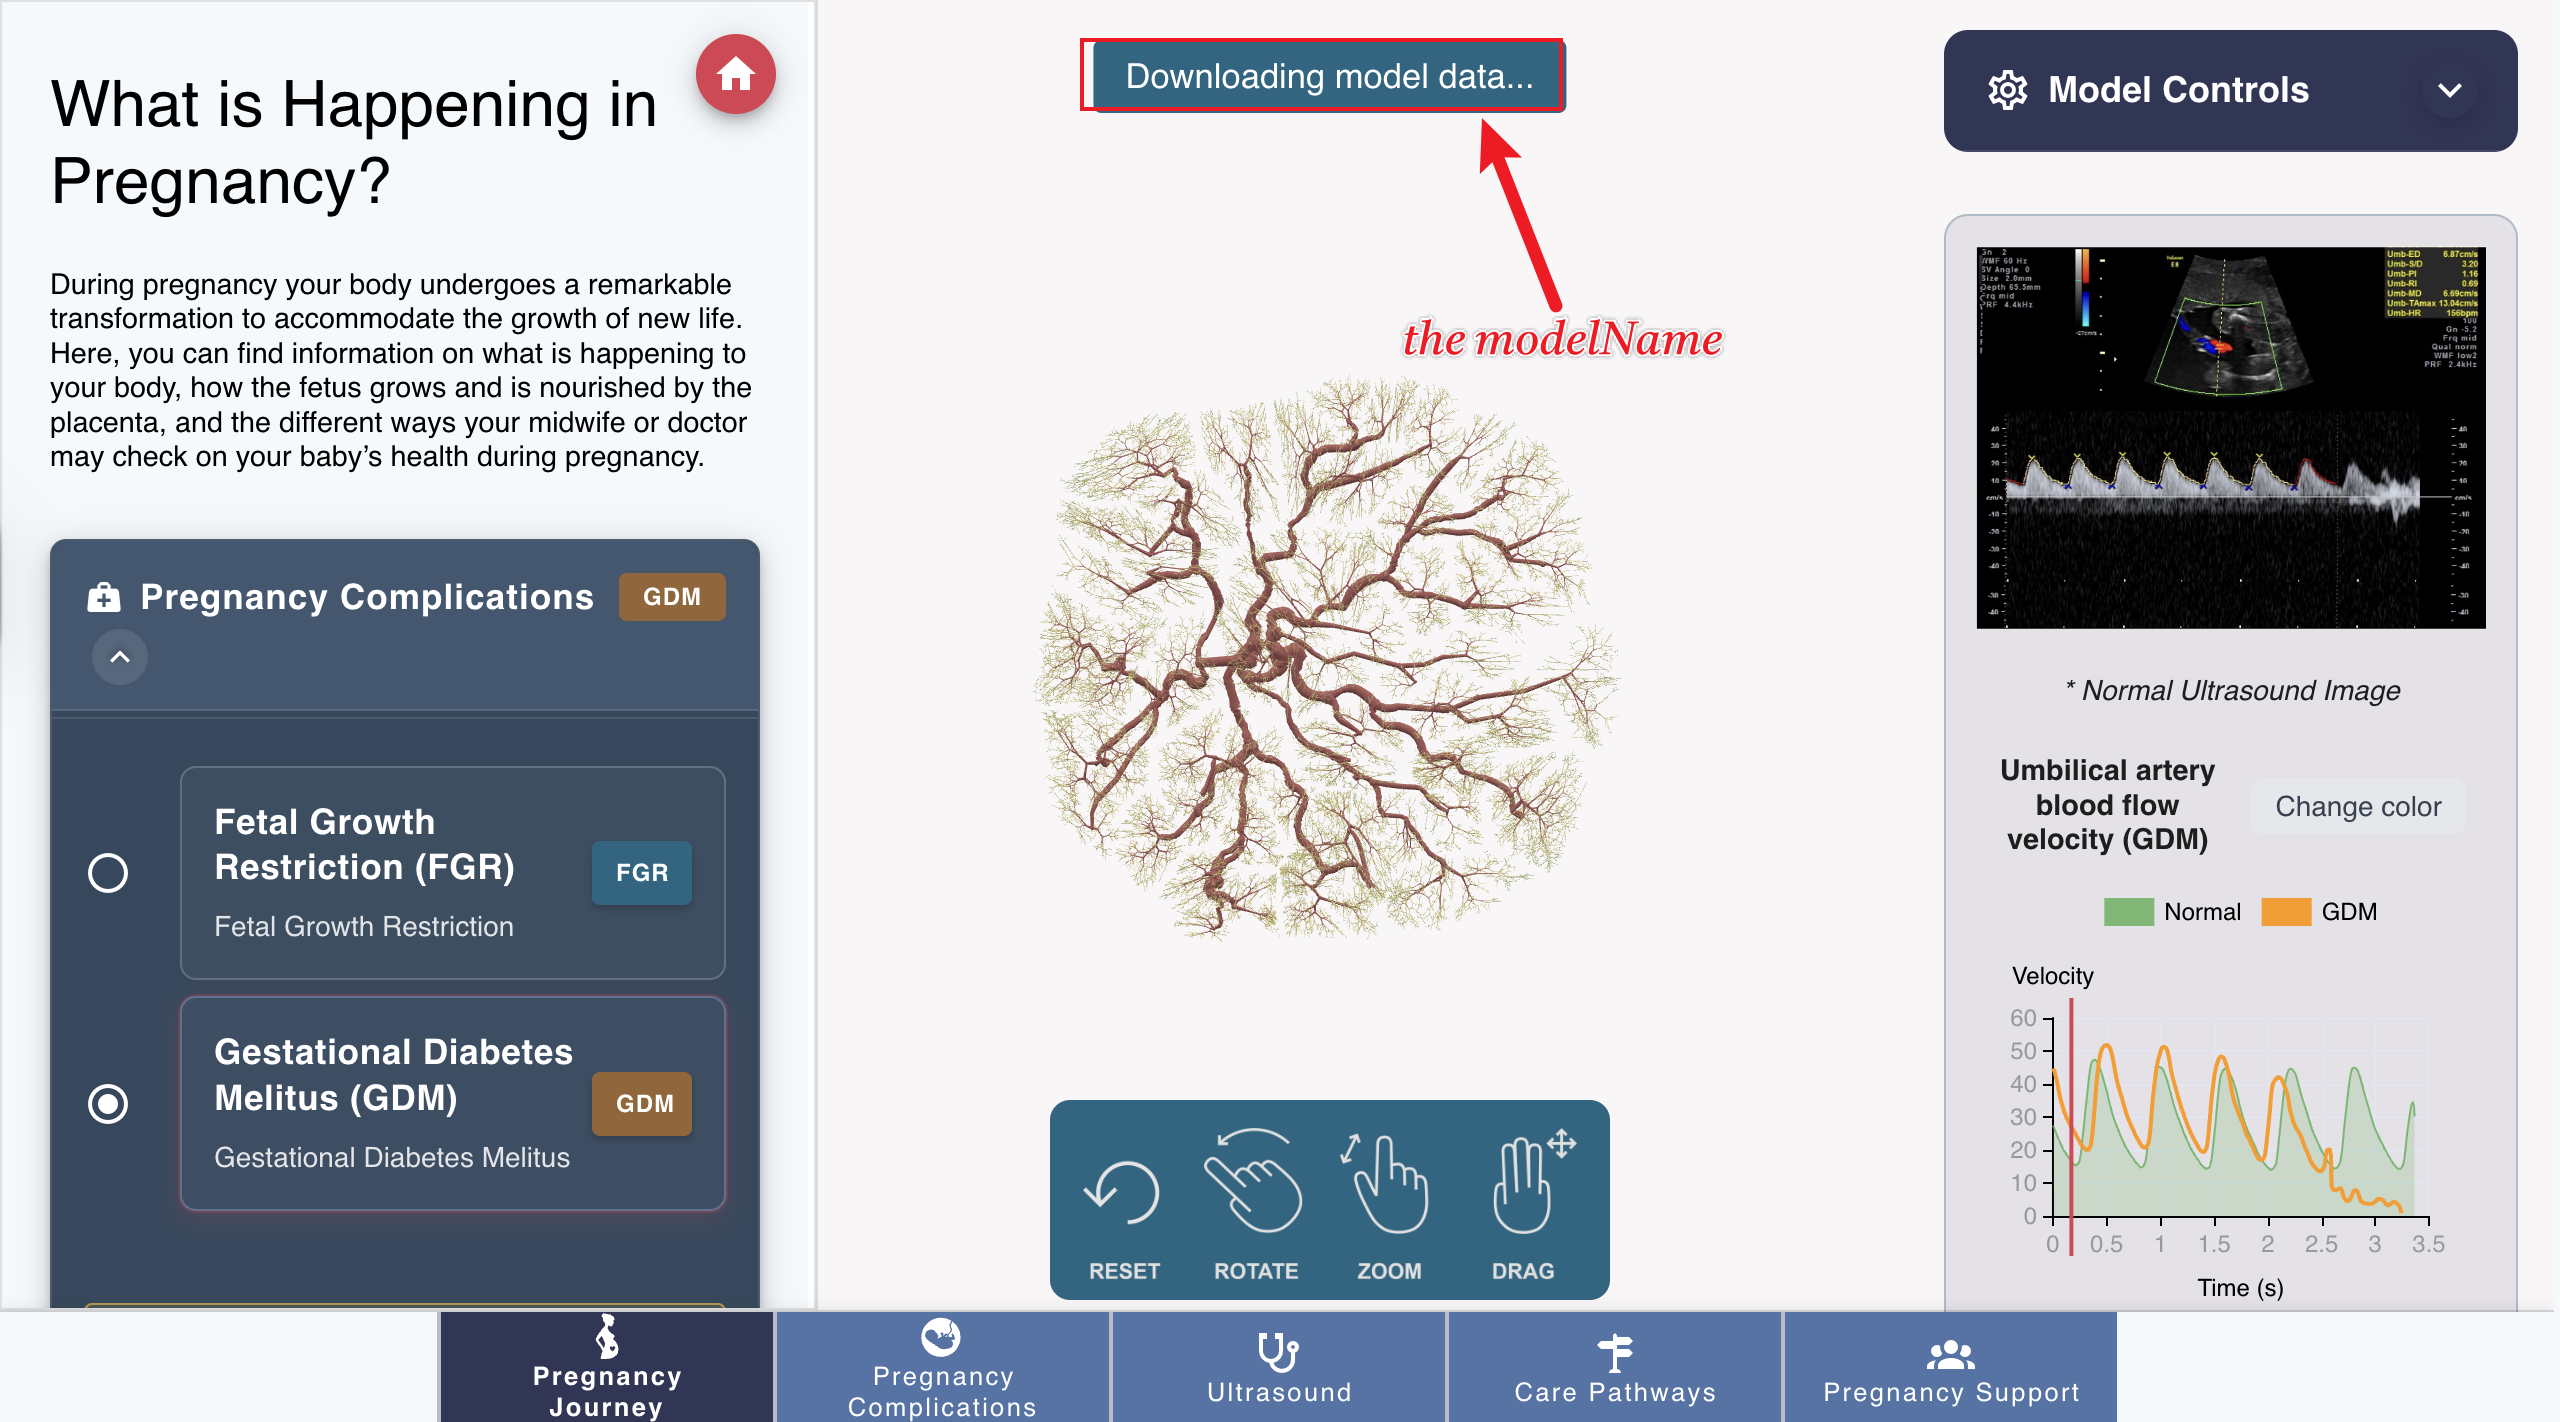
By default, the modelName is defined in the modelData.json file, you can change the modelName by updating the modelData.json file.
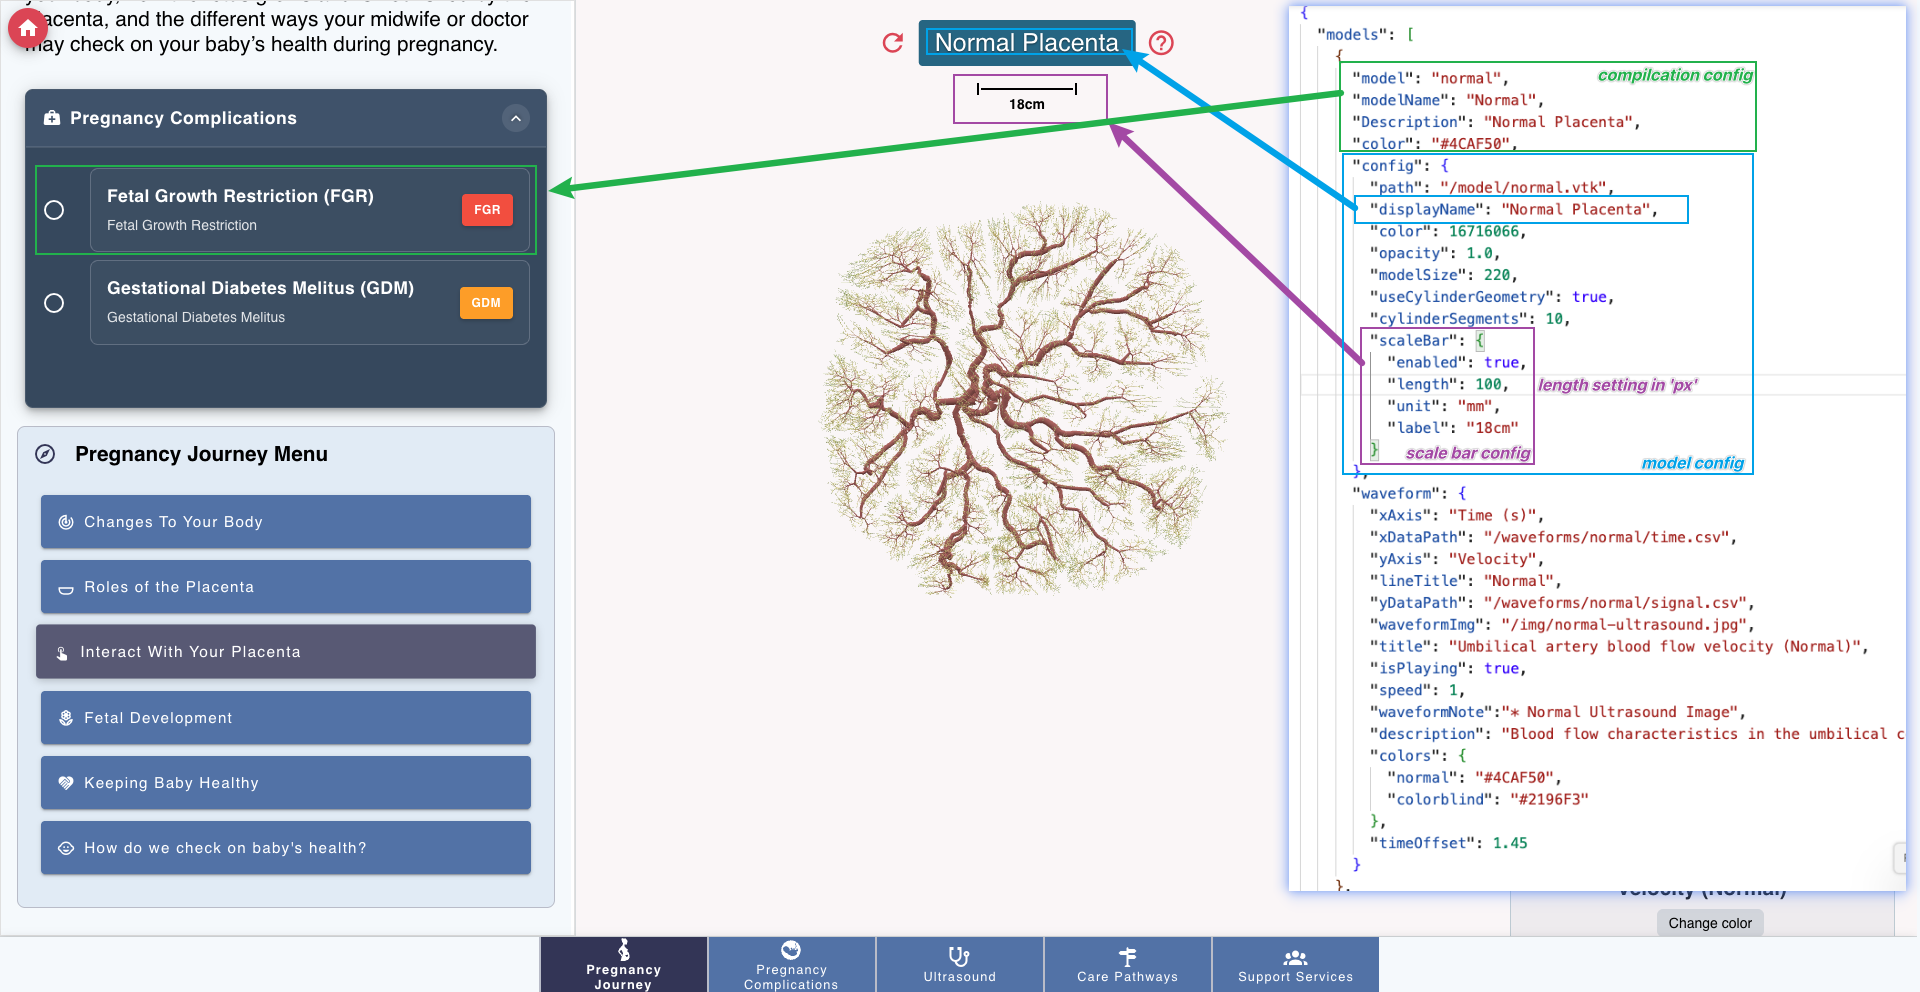
Following pictures are the mapping between model data and the UI:
Configuration of the model and the ui settings on the left side:
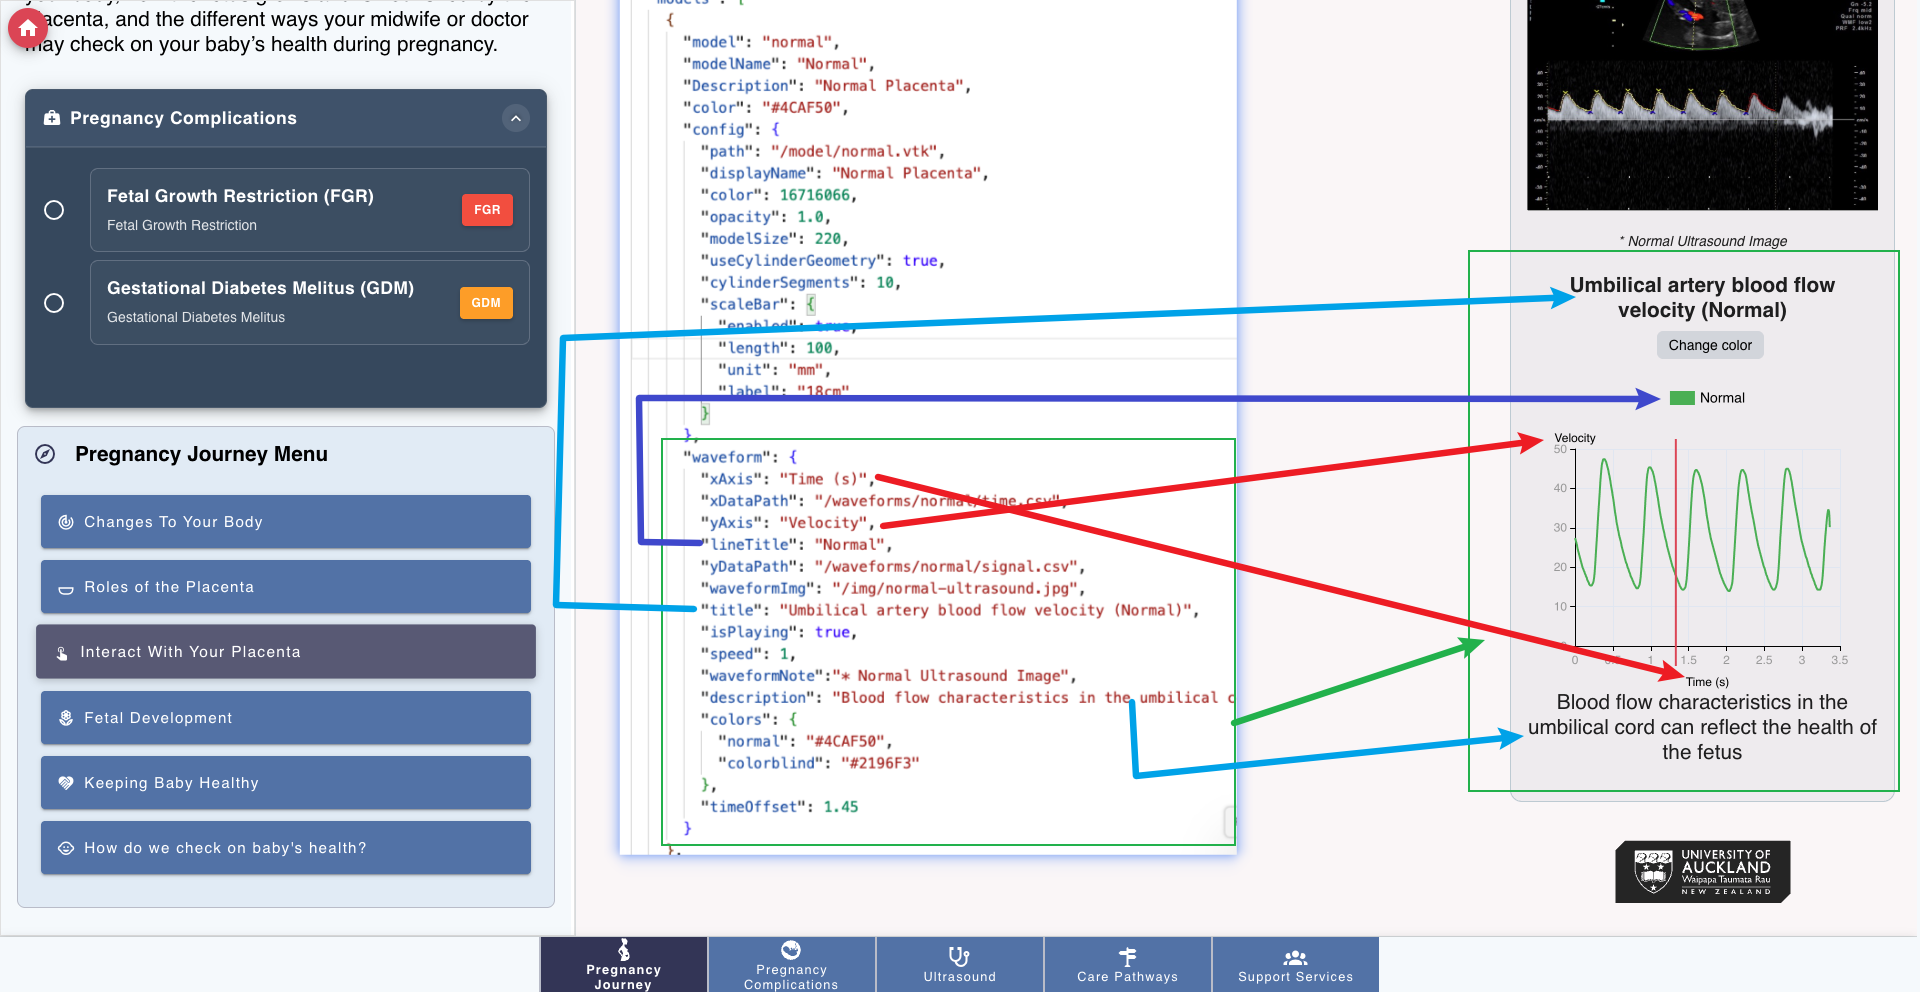
Waveform of the model configuration: